

 Akeeba Backup is a useful 3rd party Joomla! CMS extension.
It offers a quick and easy way to create Backup Archives of your Joomla! CMS website from within your website Dashboard.
And without the need to sign into your website's Hosting Control Panel, which is where you would otherwise create Backup Archives.
Once created, Backup Archives should be downloaded for safekeeping.
This should be done by connecting to the server using an FTP Client solution.
Akeeba Backup Dashboard

Getting started
The developer offers a useful User Guide which you should read before creating your first Backup Archive.
We also suggest some changes you may wish to consider in the next section of this article.
Read more: Akeeba Backup User Guides
Review Default Settings
We recommend you review and maybe change the following settings before creating your first Backup Archive.
The illustrations relate to Akeeba Backup PRO.
Hide One Click Backup
To hide the One-click backup button from the dashboard, first select the 'Configuration' button from the Akeeba Backup Dashboard.
Next, de-select the 'One-click backup icon' check box.
See image below.

Change Output Directory
Select the 'Configuration' button from the Akeeba Backup Dashboard to change the Output Directory.
- Output Directory = the destination where Backup Archives will be stored.
Before you do, sign into your Hosting Control Panel, open the File Manager screen, and create a directory outside the Document Root.
- Document Root = the directory which contains the publicly accessible content of a website (public_html on cPanel servers).
The image below shows such a directory created for storing Backup Archives: mybackups.
Use something similar and change the Output Directory field.
Example:
[ROOTPARENT]/mybackups

Review and change Count Quota
Select the 'Configuration' button from the Akeeba Backup Dashboard to review and change the number of Backup Archives to be stored at the destination (recommended).
The default setting = 3.
If left unchanged then when the fourth Backup Archive is created the oldest previous Backup Archive will automatically be deleted.

Restrict Administrator Permissions
By default Akeeba Backup Options permit Administrators as well as Super Users to administer Backup Archives.
You can change this setting if you want to restrict access to Akeeba Backup to Super Users.
Be careful not to change any other user permissions when making this change!
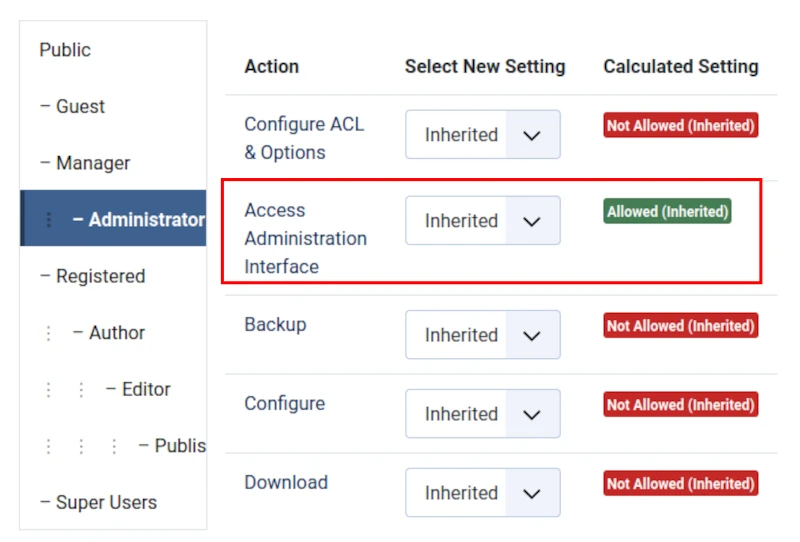
Default Administrator Permissions.
Access Administration Interface = Allowed.
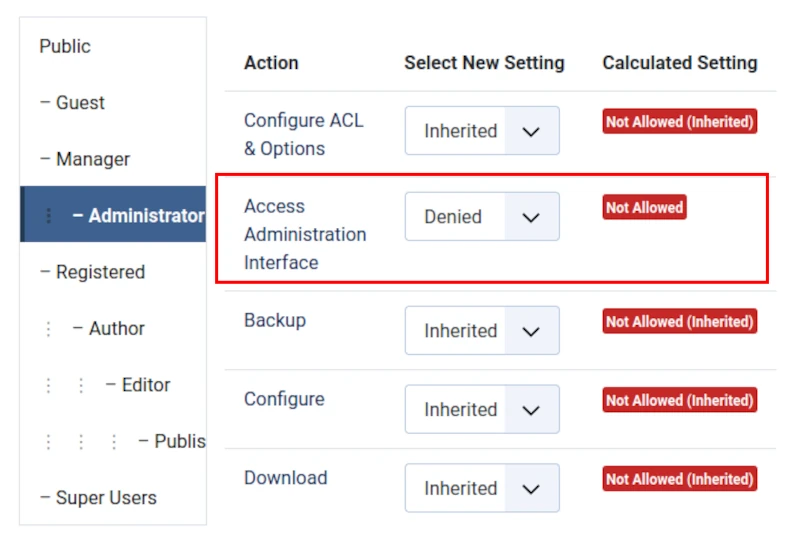
Updated Administrator Permissions.
Access Administration Interface = Denied.
Enable Action Log - Akeeba Backup Plugin
Following installation check that the Action Log - Akeeba Backup Pluginis enabled.
If it is not then you can enable it (recommended) in the Plugins screen of your website Dashboard.

Enable Backup on Update Plugin
You may wish to enable the Backup on Update Plugin.
If you do then Akeeba Backup will create a Backup Archive immediately prior to each Joomla! CMS update.

Heads up when using the Manage Backups Screen
When you click the Delete Files button, only the selected Backup Archives are removed from the server.
Removal of both Backup Archives and their respective database entries requires that you select the Delete button.

Avoid the temptation to click green download buttons like this one:

If you do click the green download button then heed the following warning: "Downloading through your browser may corrupt the files".
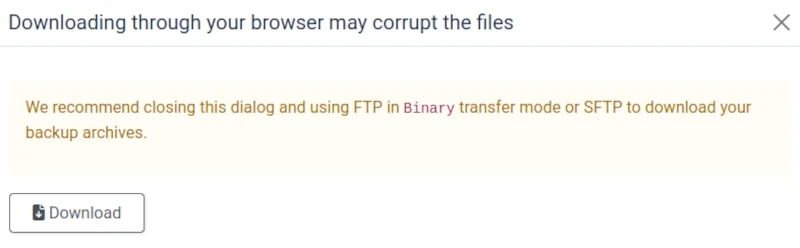
Instead, download Backup Archives from the server using an FTP Client like FileZilla.
Restoring Backup Archives
One of the Three Golden Rules of Backup states:
- Test your Backup Archive for errors.
Read more: Back up your Joomla! CMS website.
So you should know that restoration of Backup Archives created using Akeeba Backup requires that you use another Akeeba extension:
- 'Akeeba Kickstart
and that this extension is available as a free download from the developer's website.
Make Joomla! CMS Security your #1 Priority
We help and support managers responsible for Joomla! CMS websites in UK business and third sector organisations across Cheshire, Greater Manchester, Merseyside and North West England.

