

Working with Modules
 Modules enable you to control the display of almost any kind of website content in a Joomla! CMS website.
Each Module can be separately configured to determine when and where it will display content in the Front End.
For example, when someone:
- selects a Menu Link,
- signs into your website,
- visits your website from a particular device (example: smartphone).
This is called 'assigning the Module'.
In this article we cover how to assign a Module to a Position and Menu Link.
And how to determine whether the Module will be visible depending upon the device and screen size used by the visitor.
Editing Modules
Users with special permissions (Example: Administrators and Super Users) may edit Module content either after signing into the website's Dashboard or the Front End.
Sign into the Front End.
Select the button shown below to edit the features of a Module.

Note:
You will not see this button when you sign into the Front End if Global Configuration - Site - Frontend Editing = None.
See our separate article for more information.
Sign into your website Dashboard.
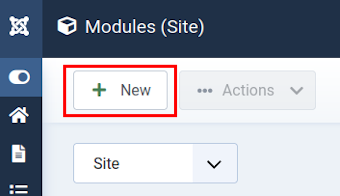
Select the Modules button from the Site panel in your website's Dashboard.

Creating new Modules
Daunted at the prospect of creating a new Module?
No worries.
WYNCHCO Website Designs include lots of exemplar Modules which have been pre-assigned by:
- Position, and
- Menu Link.
Look for an existing Module that appears similar to one that you want to create.
Duplicate it.
And then tweak its settings as required.
We cover how to create and duplicate Modules in this article.
Core Modules
The Joomla! CMS already contains a wide range of useful pre-installed Core Modules.
To see all the available Core Module types available for you to use in your website, follow these steps.
- Sign into your website Dashboard.
- Select the Modules button in the Site panel to browse, edit and create new Modules.
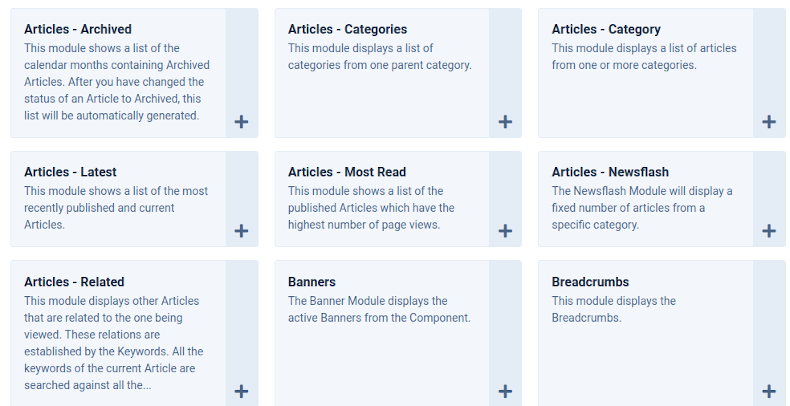
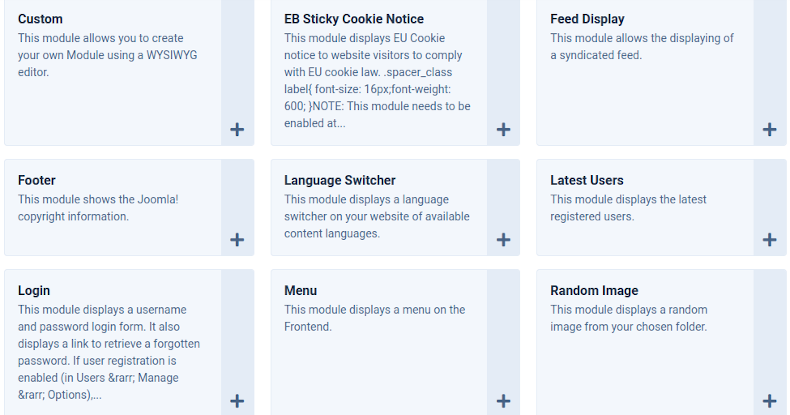
These images show the available Core Module types included with the Joomla! 4 CMS.

Over time the Joomla! Project are decoupling a number of components from the Core Joomla! CMS.
The first such component to be decoupled was Web Links.
The Web Links Module is therefore also decoupled i.e. no longer included in the Core Joomla! CMS.
- Web Links.
If your Joomla! CMS does not include this module then you will need to visit the Joomla! Extensions Directory to download and install the Web Links Component.
3rd Party Modules
You will also find a long list of optional 3rd Party Modules created by Joomla! developers in the Joomla! Extensions Directory.
A 3rd Party Module is one created by a developer, and which does not form part of the core Joomla! CMS.
The installation and uninstallation process is the same for all 3rd Party Extensions (Components, Plugins and Modules).
Read more: How to install an Extension.
Read more: How to uninstall an Extension.
You can view the vast range of 3rd Party Modules created by developers in the Joomla! Extensions Directory.
Visit: Joomla! Extensions Directory.
 Getting started with Modules
Contents include:
Make Joomla! CMS Security your #1 Priority
We offer Joomla! coaching, help and support to businesses and organisations across Cheshire, Manchester, Merseyside, North West England & the UK.
How to create a Module
Here we show you how to create a new Menu Module.
A Menu Module is needed to publish your Menu where you want it to be displayed in your website.
Select the Modules button from the Site panel in your website's Dashboard.
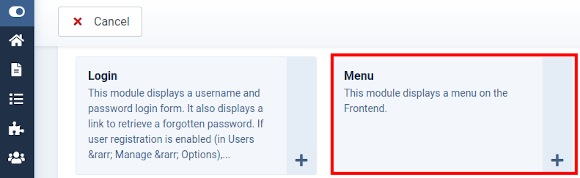
In this instance: Menu.
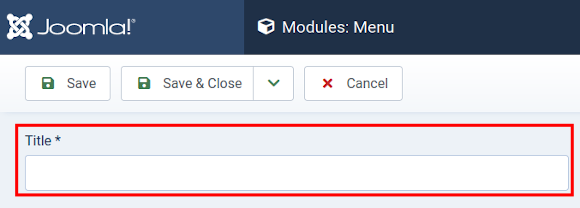
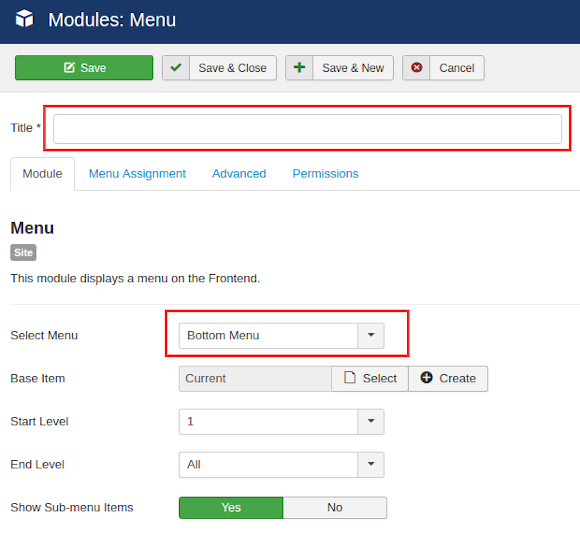
Enter a Menu Module Title.
Example: Top Menu.
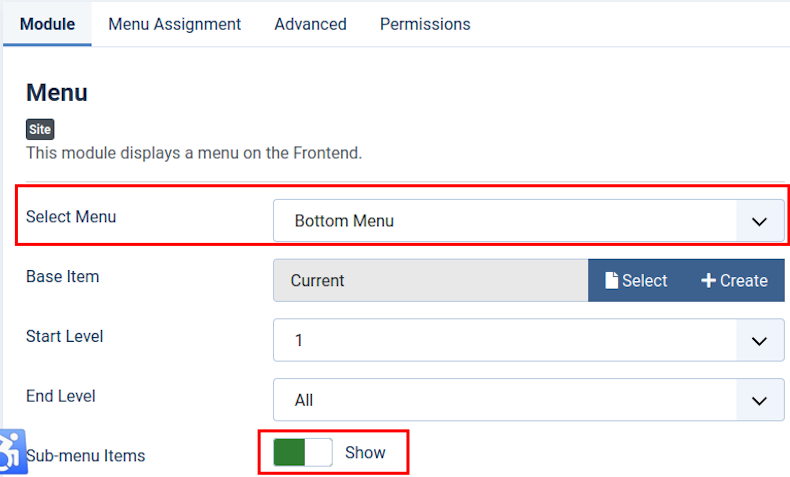
Then, under the Module tab, toggle the Select Menu button to choose the Menu to be displayed by the new Menu Module.
Example: Top Menu.
The image below shows Sub-menu Items = Show.
This means that Sub-Menu Links will be visible in the Front End (recommended).
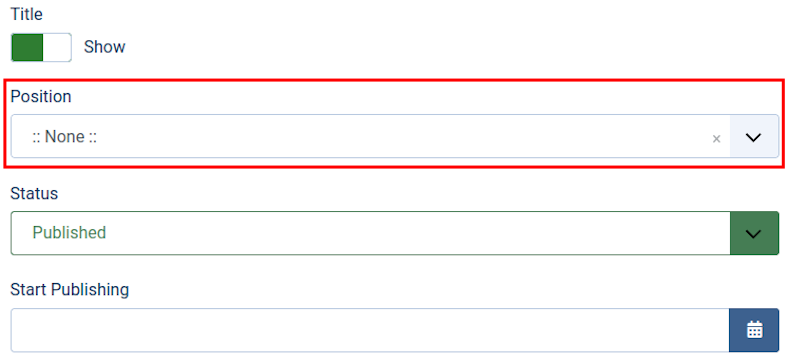
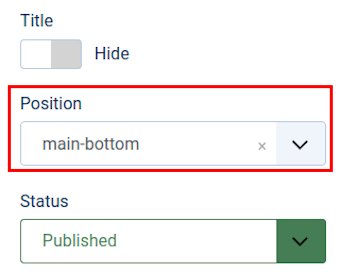
The Menu Module Title will be displayed by default.
Change Title = Show to Title = Hide if you would rather not display a title.
And choose a Position.
Example: sidebar-right.
If you do not choose a Position then the Menu Module and its associated Menu will not be visible in the Front End.
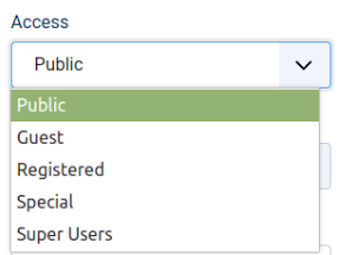
Choose an Access Level or User Group.
Default Access Level (or User Group) = Public.
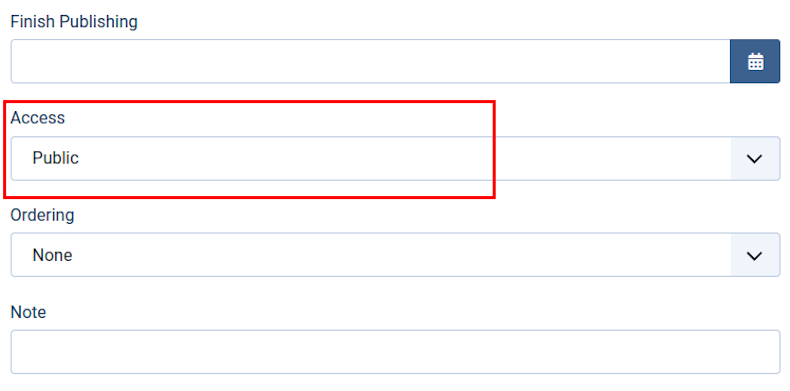
The image below shows the available User Groups in a default Joomla! CMS website.
The default User group = Public.
The Module will be visible to all website visitors when published.
If you were to select Registered then the Module will not be visible until a user signs into the Front End.
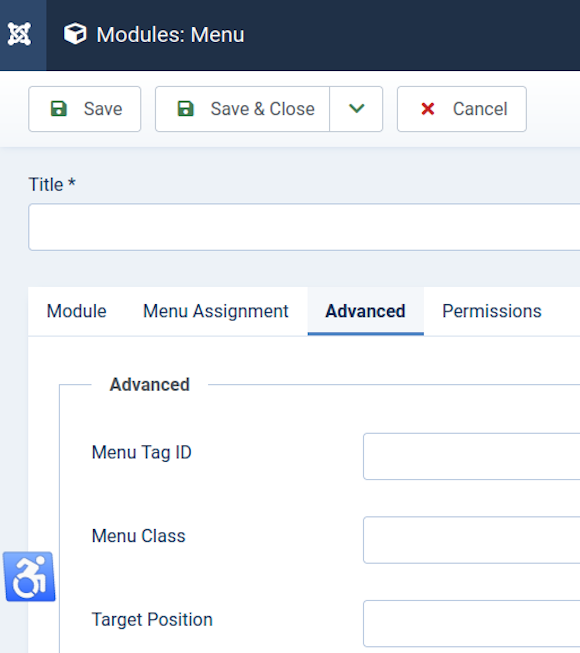
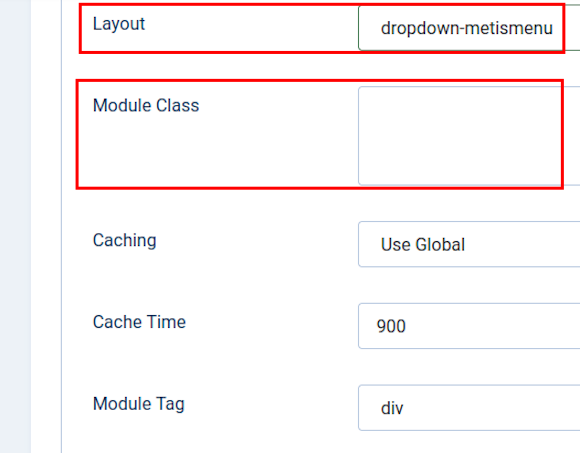
There are two fields under the Advanced tab which require careful attention when you create a new Menu Module.
These are Layout and Module Class (see image below).
See our separate article for how to complete these fields.
Daunted at the prospect of creating a new Menu Module?
Look for an existing Menu Module that appears similar to one that you want to create.
Duplicate it.
And then tweak its settings as required.
Read more: How to duplicate a Module.
How to duplicate a Module
Daunted at the prospect of creating a new Module?
No worries.
WYNCHCO Website Designs include lots of exemplar Modules which have been pre-assigned by:
- Position, and
- Menu Link.
Look for an existing Module that appears similar to one that you want to create.
Duplicate it.
And then tweak its settings as required.
How to duplicate a Module
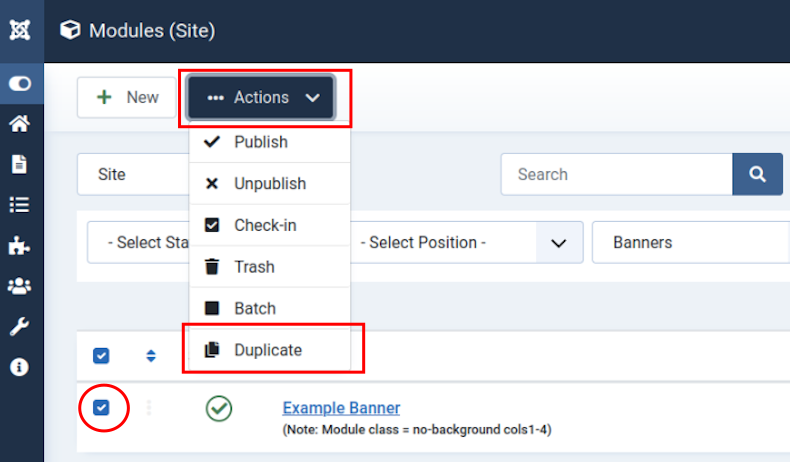
Open the Modules screen of your website's Dashboard.
Select the check box next to an existing Module you want to duplicate.
The image below shows the check box next to a Banner Module has been selected.
Next, click the Actions button at the top of the screen.
Then, select Duplicate from the drop-down menu which appears.
An exact copy of the Module you selected will be created.
And will be listed next to the original Module in the Modules screen.
You may then change its settings and publish it.
Example: Duplicated Menu Module
Having duplicated a Menu Module, you will most likely want to change the Select Menu setting.
And change the Module Title to reflect the new choice of Menu to be displayed.
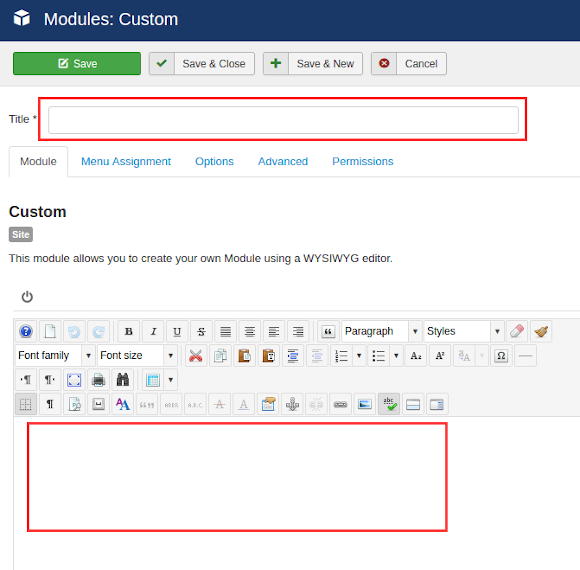
Example: Duplicated Custom Module
Having duplicated a Custom Module, you will most likely want to change text and images.
And change the Module Title to reflect the new content.
Why duplicating Modules makes sense
The Look & Feel of a Module is determined by the Style Sets assigned to it.
Assigning Style Sets can be confusing, and therefore time-consuming.
When you duplicate a Module you will not need to think about assigning a Style Set to it.
Reason: the duplicated Module will inherit the settings of the original.
This is why we include lots of exemplar Modules in a WYNCHCO Website Design.
How to assign a Module to a Position
In other words, control where it is displayed.
A Position is a place-holder to enable the display of Modules outside the Main Body of the website.
All Joomla! Templates include Positions.
A Module must be assigned to a Position before it will be visible in the Front End.
A very simple Template might comprise of just two Positions:
- Top (dark grey in the image below), and
- Right (light grey)
and a Main Body (the white area).

The Main Body is where website Articles are displayed.
It is not a Position, but it serves a similar purpose, namely, controls where content is displayed.
Example: published Articles are by default displayed in the Main Body.
How to choose a Position
Toggle the Position field under the Module tab to assign a Module to a Position.
Position Maps
A Position Map is an illustration showing where Positions will display Modules assigned to them in a web browser.
The Position Maps for WYNCHCO Template Designs can be viewed at the following link.
The linked article also shows how you can see your website's Positions in your web browser - with each one being clearly labelled and highlighted.
Create New Positions
You can create new Positions.
One way is to edit the Template but this requires some template design skills.
A quicker and easier way - if you prefer not to get technical - is to use the Loadposition Command.
See our separate article.
Read more: How to use the Loadposition Command.
Work smarter not harder!
We coach, help and support managers of businesses and organisations across Cheshire, Manchester, Merseyside, North West England and the UK.
How to assign a Module to a Menu Link
In other words, control when it is displayed.
The process is the same regardless of Module type.
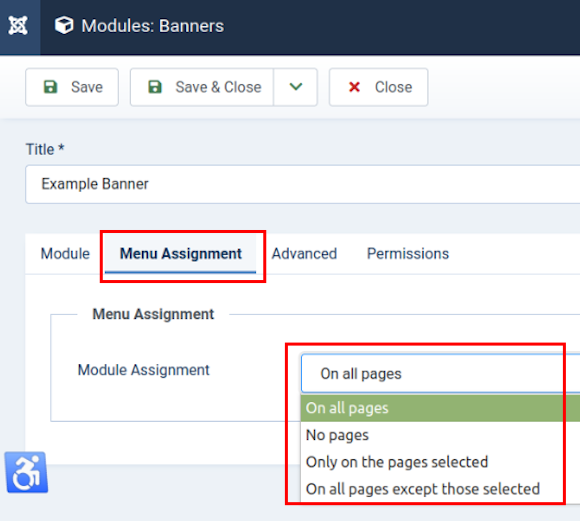
The image below shows a Banner Module.
Any Module can be assigned to one or more Menu Links under the Menu Assignment tab.
The assigned Module will only be visible in the Front End when the selected Menu Links are visited.
How to assign a Style Set to a Module
The Template included with a WYNCHCO Website Design includes lots of Custom Style Sets.
These Custom Style Sets can be assigned to a Module to change its appearance or determine when it is displayed depending upon the device and screen size used by a visitor.
Being able to control when a Module is displayed offers the potential for improving:
- page load speeds on small screen devices,
- performance in search engines, and
- visitor experience,
- visitor return.
Custom Style Sets may be used to either:
- hide, or
- show
a Module in response to the device and screen size being used by a visitor.
The process is the same regardless of Module type.
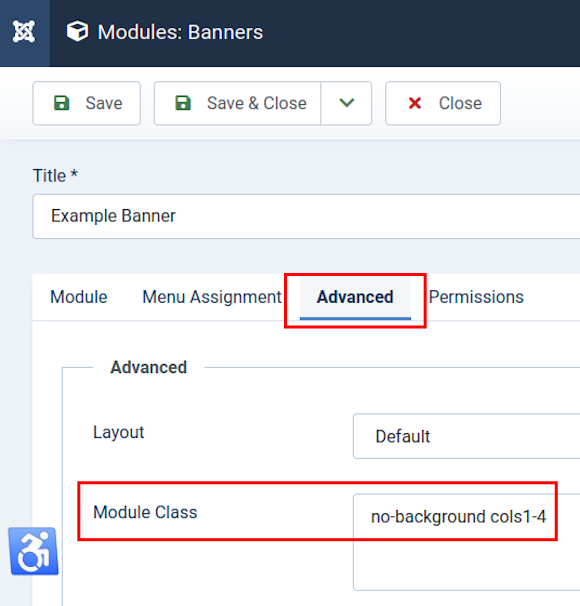
The image below shows a Banner Module.
It is easy to assign a Style Set to a Module:
- open the Module screen;
- select the Advanced tab;
- add the names of Custom Style Sets to the Module Class field;
- select Save and Close and review the change in the website Front End.
Note: when using more than one Style Set, leave a space after each one (all lower case text).
Custom Style Sets to control when Modules are displayed
Custom Style Sets can be used to determine when a Module is displayed in response to the device and screen size used by a visitor.
Visit the following link to see the range of Custom Style Sets included in a WYNCHCO Website Design for this purpose..
Read more: Control when content is displayed .
Duplicate Modules
Daunted at the prospect of assigning a Style Set?
No worries.
WYNCHCO Website Designs include exemplar content, including Modules with pre-assigned Style Sets.
Look for an existing Module that appears similar to one that you want to create.
Duplicate it.
You can then tweak its settings as required.
Read more: How to duplicate a Module.
The Loadposition Command
How to display Modules inside Articles
The image shown here illustrates a Module being displayed inside an Article using a Custom Position.

This is achieved using the Loadposition Command.
The Joomla! CMS enables you to create Custom Positions in addition to the ones included with your website's Template.
Using the Custom Positions, Modules can be displayed inside Articles and Category introductions.
For more information about Positions and Position Maps, visit the link below.
Loadposition Syntax
The Loadposition Command syntax we use to insert the above Module inside this Article looks like this:

In this example, the word Example is the name of the Custom Position.
The Load Modules Plugin
The Content - Load Modules Plugin must be enabled for you to be able to use either Command.
This plugin is enabled by default in a WYNCHCO Website Design - see image below.

How to use Loadposition Command
"To insert a module inside an article, use the command, as follows:
- Create a module and set its position to any value that doesn't conflict with an existing template position. You can type in the position value instead of selecting it from the drop-down list. For example, use the position myposition.
- Assign the module to the Menu Items that contain the articles that you want the module to show in. You can also just assign the module to all Menu Items.
- Edit the articles where you want this module to appear and insert the text in the article at the place where you want the module."
Source: Joomla! Documentation.
An Example
Follow the steps in the example below to use the Loadposition Command to publish a Module inside an Article.
Select a Module in the Modules screen of your website''s Dashboard.
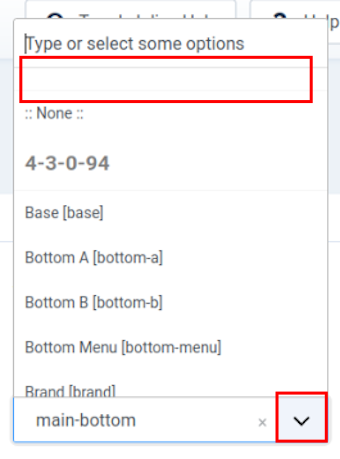
Look for the Position field under the Module tab.
Add the name of a custom Position to the field where it states:
Type or select some options.
See highlighted box in the image below.
Type a custom Position name, taking care to:
- enter a unique name, and
- use only lower case letters without any spaces.
Click the return (or enter) key on your device keyboard when done.
If you don't click return (or enter) then your custom Position will not be created.
The Module will be assigned to the Custom Position when you click Save.
Now that you have created a Custom Position you can use the Loadposition Command to display a Module - using the Custom Position - inside an Article.
See next tab.
When you add the Loadposition Command to an Article using curly brackets (as in the image below), it will call the Module you edited to the screen when the Article is viewed in the front end.

The Module you edited will now be visible inside the Article when viewed in the front end.
Image shows a Module displayed inside an Article
Work smarter not harder!
We coach, help and support managers of businesses and organisations across Cheshire, Manchester, Merseyside, North West England and the UK.
 Call 0161 818 8228 for Joomla! CMS Help & Support
 Contact us for Joomla! CMS Help & Support